
Compress PDF Without Losing Quality: Easy 2026 Guide
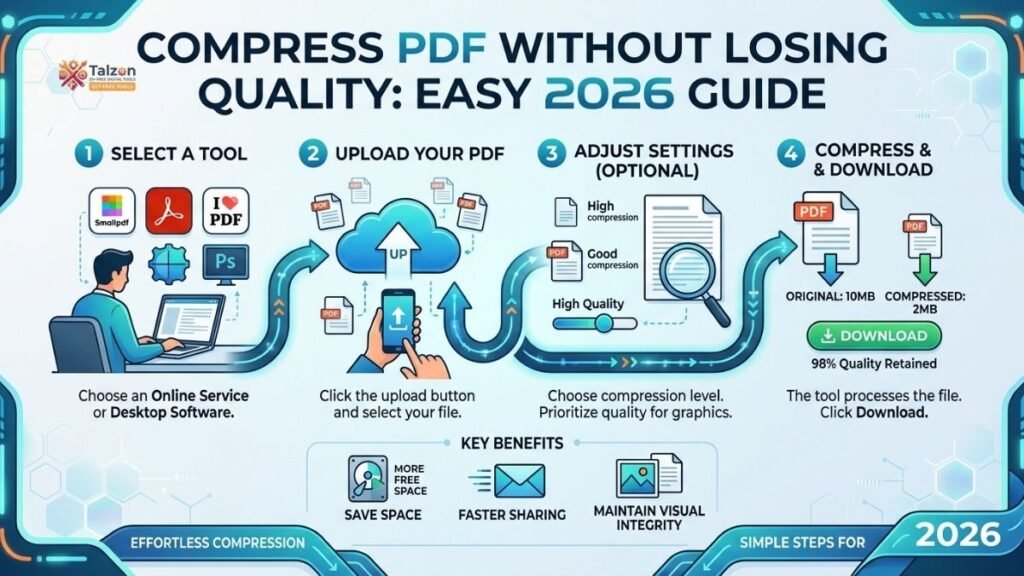
Nobody likes hitting “attach” and seeing that dreaded “file too large” warning. PDFs are fantastic for sharing documents, but they can balloon in size—especially when they’re packed with high-resolution images, embedded fonts, or complex graphics. The good news? You can compress PDF files dramatically without making them look blurry or unprofessional. In this guide, you’ll learn exactly how to reduce PDF file size without losing quality, using methods that work on Windows, Mac, mobile, and even in your browser.
Why PDFs Get So Big (And What You Can Do About It)
Before diving into solutions, it helps to understand what makes a PDF heavy. A PDF isn’t just a “picture of a page.” It’s a container that can hold:
- High-resolution images (often 300 DPI or more, meant for print)
- Embedded fonts (so the document looks the same on every device)
- Vector graphics, annotations, layers, and metadata
- Duplicate resources (the same image or font embedded multiple times)
When you compress PDF files, you’re not magically deleting content—you’re optimizing how that content is stored. There are two main approaches:
- Lossless compression: Removes redundancy (duplicate fonts, unused objects, inefficient encoding) without changing how anything looks. Safe for text-heavy documents, contracts, and files you’ll edit later.
- Lossy compression: Reduces image resolution or re-encodes photos with smarter algorithms. This is where most of the size savings happen, and when done right, the quality loss is imperceptible on screens.
The key is choosing the right balance for your use case. Sending a resume via email? You can afford more compression. Preparing a portfolio for print? Stick to gentle, visually lossless settings.
Method 1: Use a Dedicated Online PDF Compressor
For most people, the fastest way to compress PDF without losing quality is to use a trusted online tool. These services apply smart compression algorithms automatically, often offering presets like “Recommended,” “High Quality,” or “Extreme Compression.”
How it works:
- Visit a reputable PDF compressor (look for ones that mention “lossless” or “visually lossless” options).
- Upload your PDF.
- Choose a compression level—start with “Recommended” or “High Quality.”
- Download the compressed file and preview it.
Most modern tools downsample images to 150 DPI for screen viewing (perfect for email and web) while keeping text razor-sharp. You’ll typically see 60–80% size reduction with no visible difference.
Pro tip: If your document contains sensitive information, choose a tool that processes files locally in your browser (no upload to servers). Many 2026 tools now offer this privacy-first option.
Method 2: Built-in Tools on Mac (Preview & Quartz Filters)
Mac users have a powerful, free option built right into the operating system. macOS includes Quartz Filters that can reduce PDF size with a single click.
Steps:
- Open your PDF in Preview.
- Go to File > Export (not “Export as PDF”).
- In the “Quartz Filter” dropdown, select Reduce File Size.
- Save the new file.
This method applies lossless optimization and moderate image downsampling. It’s ideal for everyday documents like reports, invoices, or school assignments. If you need more control, you can even create custom Quartz Filters in ColorSync Utility to fine-tune DPI and JPEG quality.
Method 3: Adobe Acrobat Pro (The Gold Standard)
If you have access to Adobe Acrobat Pro (not the free Reader), you get the most granular control over PDF compression. Acrobat’s “Optimize PDF” tool lets you choose exactly which elements to compress and how aggressively.
Steps:
- Open the PDF in Acrobat Pro.
- Go to File > Save As Other > Reduced Size PDF (or use Optimize PDF for advanced settings).
- Choose compatibility (e.g., “Acrobat 10.0 and later” for best compression).
- For advanced control, click Advanced Optimization to adjust image downsampling, font subsetting, and object compression.
Acrobat can subset fonts (embed only the characters you actually use), remove hidden layers, and recompress images with JPEG2000 for better quality at smaller sizes. This is the go-to method for professionals who need to compress PDF files while preserving print-ready quality.
Method 4: Windows Built-in Options (Print to PDF + Third-Party Tools)
Windows doesn’t have a native “Reduce File Size” button like Mac, but you can still shrink PDFs effectively.
Option A: Print to PDF with a Virtual Printer
- Open your PDF in any viewer (Edge, Chrome, Adobe Reader).
- Press Ctrl + P to open the Print dialog.
- Choose Microsoft Print to PDF (or a third-party virtual printer like PDF24).
- In printer properties, look for quality or compression settings (some virtual printers offer “Smallest File Size” presets).
- Print to a new PDF file.
This method re-renders the document, often stripping out unnecessary metadata and recompressing images. It’s not as precise as Acrobat, but it works well for quick fixes.
Option B: Free Third-Party Tools
Tools like PDF24 Creator, Free PDF Compressor, or SmartSlim (a 2026 favorite for local, batch compression) offer desktop apps that work offline. SmartSlim, for example, claims up to 92.5% compression while keeping files on your machine—great for sensitive documents.
Method 5: Command-Line Power Users (Ghostscript)
For tech-savvy users or those automating workflows, Ghostscript is a free, open-source command-line tool that can compress PDF files with surgical precision.
Basic command:
gs -sDEVICE=pdfwrite -dCompatibilityLevel=1.4 -dPDFSETTINGS=/ebook -sOutputFile=output.pdf input.pdfThe -dPDFSETTINGS flag controls compression:
/screen: Lowest quality, smallest size (72 DPI images)/ebook: Medium quality (150 DPI)—ideal for most use cases/printer: High quality (300 DPI)/prepress: Maximum quality (often larger than original)
This method is perfect for batch-processing hundreds of files or integrating compression into scripts. Just be sure to test settings on a sample file first.
Smart Compression Tips: Get More Size Reduction Without Sacrificing Quality
No matter which method you choose, these pro tips will help you compress PDF files more effectively:
1. Try Lossless First
Always run a lossless optimization pass before applying any lossy compression. This removes duplicate fonts, unused objects, and inefficient encoding—often shaving off 20–40% with zero quality loss.
2. Match Resolution to Your Use Case
Don’t downsample to 72 DPI if you’re sending to a printer. For screen viewing (email, web, presentations), 150 DPI is plenty. For print, stick to 300 DPI. Anything higher is wasted space.
3. Compress Images Moderately, Not Aggressively
A moderate compression pass on all images usually looks better than an extreme pass on just some. Over-compression creates visible artifacts (blocky photos, blurry text backgrounds) that degrade quickly past a certain point.
4. Strip Unnecessary Elements
Remove embedded thumbnails, flatten annotations, and delete hidden layers. These elements add bulk without adding value for most recipients.
5. Keep the Original
Once you’ve downsampled or recompressed, you can’t undo it. Always save the original file in case you need a higher-quality version later.
Common Mistakes to Avoid When You Compress PDF Files
Even with the best tools, it’s easy to make mistakes that hurt quality or waste time:
- Using “Extreme Compression” for everything: Aggressive settings are great for drafts or internal docs, but not for client-facing materials or portfolios.
- Ignoring the preview: Always open the compressed file and zoom in to check text sharpness and image clarity.
- Compressing already-compressed files: If your PDF was exported from a design tool with “web-optimized” settings, further compression may yield minimal gains—or worse, degrade quality unnecessarily.
- Forgetting about accessibility: Some compression tools strip out tags or alt text needed for screen readers. If accessibility matters, use tools that preserve PDF/A or tagged PDF structures.
When to Use Lossless vs. Lossy Compression
Still unsure which method to choose? Here’s a quick decision guide:
| Use Case | Recommended Approach | Why |
|---|---|---|
| Text-heavy documents | Lossless only | No images to downsample; focus on removing redundancy |
| Photos or scanned pages | Lossy (moderate settings) | Images dominate file size; downsampling yields biggest savings |
| Legal contracts/signatures | Lossless or visually lossless | Preserve exact appearance; avoid any risk of artifacting |
| Print-ready portfolios | Lossy at 300 DPI | Balance quality and size; 300 DPI is print standard |
| Email attachments | Lossy at 150 DPI | Screen viewing doesn’t need high resolution; 150 DPI is plenty |
| Sensitive/confidential docs | Local/offline tools | Avoid uploading to cloud services; use desktop or browser-based tools |
Final Thoughts: Compress PDF Smart, Not Hard
Reducing PDF file size doesn’t have to mean sacrificing quality. With the right tools and techniques, you can compress PDF files by 60–90% while keeping text crisp, images clear, and layouts intact. Whether you’re using a one-click online tool, built-in OS features, or advanced software like Acrobat, the key is to match your compression strategy to your document’s purpose.
Start with lossless optimization, then apply gentle lossy compression if needed. Always preview the result, and keep your original file safe. By following these steps, you’ll never again be stuck with a PDF that’s too big to email—or too blurry to use.