
Freelancer Invoice Guide for Beginners | Get Paid Easily
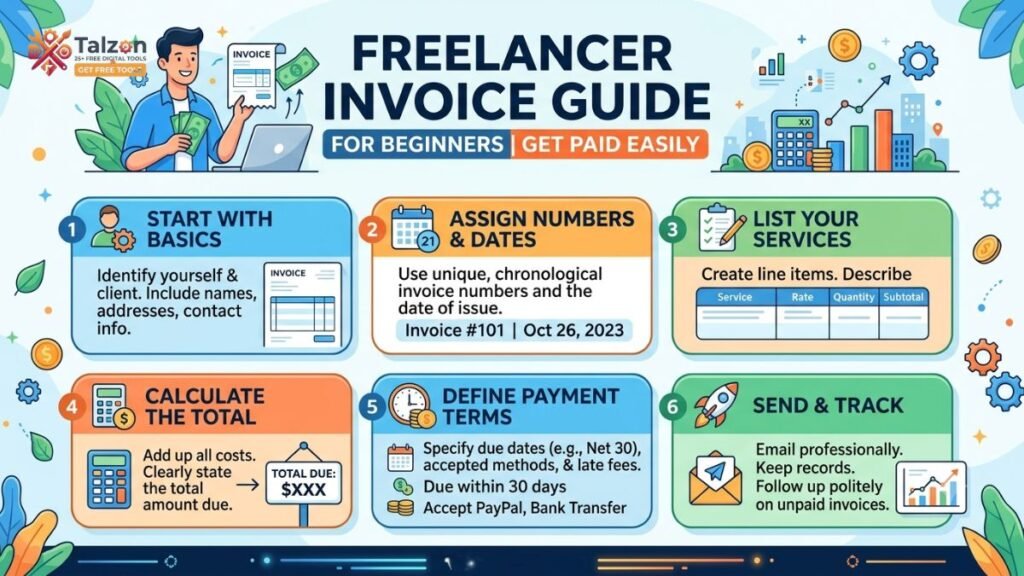
Starting your freelance career is exciting. You get to choose your clients, set your schedule, and work on projects that match your skills. However, one part of freelancing often feels confusing at first: getting paid professionally.
That is where invoicing comes in. A well-prepared freelancer invoice tells your client what work you completed, how much they owe, when payment is due, and how they can pay you. It also helps you look organized, build trust, and maintain accurate financial records.
In this beginner-friendly guide, you will learn what an invoice is, what information to include, how to create one, which mistakes to avoid, and how to encourage clients to pay on time.
What Is a Freelancer Invoice?
A freelancer invoice is a document that requests payment from a client for completed work or delivered services. It usually includes your business information, the client’s details, a description of the project, the total amount due, and payment instructions.
An invoice is different from a proposal or contract. A proposal explains what you plan to do and how much it may cost. A contract establishes the terms of your working relationship. An invoice is sent when you need to request payment according to those agreed terms.
You can send an invoice after completing a project, at the end of each month, or at specific milestones. Some freelancers also request an upfront deposit and invoice the remaining balance after the work is finished.
Why Invoicing Matters for Freelancers
Invoicing is not just an administrative task. It is an important part of running your freelance business.
It Helps You Get Paid
Clients need clear payment information before they can pay you. If your invoice is missing the total, due date, or payment method, the client may delay payment while asking for clarification.
A complete invoice makes the next step obvious. The client can quickly understand what they owe and how to settle the balance.
It Makes You Look Professional
Your invoice is part of your brand experience. A clean, accurate document shows that you take your work seriously. Even if you are a beginner, professional invoicing can help you appear reliable and established.
It Creates a Paper Trail
Invoices provide written evidence of your work and income. You can use them to track unpaid balances, review your monthly earnings, prepare tax records, and resolve disagreements about payments.
It Prevents Confusion
A detailed invoice connects the payment request to the original project. It shows the services provided, the agreed rate, and any additional expenses. This reduces misunderstandings between you and your client.
What to Include in a Freelancer Invoice
Every freelancer invoice can look slightly different, but it should contain the essential information below.
1. Your Business Details
Add your name or business name at the top of the invoice. Include your email address, phone number, website, and business address if appropriate.
If you have a logo, you can add it to make the document more recognizable. Keep the design simple and make sure your contact information is easy to find.
2. Client Information
Include the client’s name, company name, billing address, and email address. If you are working with a larger organization, address the invoice to the correct department or accounts-payable contact.
Sending an invoice to the wrong person can create unnecessary delays.
3. Invoice Number
Assign a unique invoice number to every document. You might use a simple sequence such as INV-001, INV-002, and INV-003. You could also include the year, such as 2026-001.
A consistent numbering system makes it easier to find invoices and discuss them with clients.
4. Invoice Date and Due Date
The invoice date shows when you issued the document. The due date tells the client when payment is expected.
For example, if your terms are “Net 15,” payment is due 15 days after the invoice date. Always write the exact due date as well, because it removes uncertainty.
5. Description of Services
Describe what you did in clear, specific language. Avoid writing only “freelance services” or “project work.” Instead, mention the actual deliverables.
For example:
- Website homepage copywriting.
- Five social media captions.
- Logo design and two revision rounds.
- Monthly bookkeeping for June.
A useful description helps the client confirm that the invoice matches the work completed.
6. Rates, Quantities, and Amounts
Show how you calculated the total. If you charge hourly, list the number of hours and your hourly rate. If you charge per project, list the agreed project fee. For recurring services, specify the billing period.
A basic line item might look like this:
“Blog writing: 4 articles × $100 = $400.”
This level of detail is easier to understand than one unexplained total.
7. Taxes and Expenses
If you are required to charge sales tax, value-added tax, or another local tax, show it separately. You should also list approved expenses, such as stock images, software purchases, printing, or travel costs.
Do not add unexpected expenses. Any reimbursable cost should be discussed with the client before you incur it.
8. Total Amount Due
Clearly display the subtotal, taxes, discounts, deposits already paid, and final balance. The amount due should be visually easy to identify.
If the client has already paid a deposit, show it as a deduction rather than requesting the full project amount again.
9. Payment Instructions
Tell the client exactly how to pay you. Depending on your location and client preferences, you may accept bank transfers, payment platforms, cards, digital wallets, or other methods.
Include the information needed to complete the payment, such as your account name, bank details, payment link, or platform username. Double-check these details before sending the invoice.
10. Notes and Terms
Use the notes section for a short thank-you message, late-payment policy, or reminder about the project. For example:
“Thank you for your business. Payment is due by August 22, 2026. Please contact me with any questions.”
Keep the wording polite and professional.
How to Create a Freelancer Invoice
Creating an invoice becomes easier when you follow a repeatable process.
Step 1: Review Your Agreement
Before preparing the invoice, check your contract, proposal, or written messages. Confirm the agreed price, payment schedule, deposit, deliverables, and expense policy.
This helps you bill accurately and prevents disputes.
Step 2: Choose a Format
You can create an invoice using a word processor, spreadsheet, design tool, accounting platform, or invoicing app. Beginners often start with a simple template.
A professional PDF is usually a good choice because the formatting remains consistent when the client opens it.
Step 3: Add the Required Details
Enter your information, the client’s information, invoice number, dates, service descriptions, rates, taxes, and total amount due.
Review every number carefully. A small error can make a client question the entire invoice.
Step 4: Proofread the Document
Check the spelling of the client’s name, the billing email, bank details, project description, calculations, and due date. Make sure the invoice number is unique.
Reading the invoice once from the client’s perspective can reveal missing information.
Step 5: Save and Send It
Save the final document as a PDF with a clear file name, such as “INV-026-ABC-Design.pdf.” Then email it to the appropriate client contact.
Your email can be simple:
“Hi Maya, attached is invoice INV-026 for the website design project. The balance of $750 is due on August 22. Please let me know if you have any questions. Thank you.”
Set Clear Payment Terms
Payment terms explain when and how you expect to be paid. Discuss them before beginning the project, then repeat them on your invoice.
Common terms include:
- Due on receipt: Payment is expected as soon as the client receives the invoice.
- Net 7: Payment is due within seven days.
- Net 15: Payment is due within 15 days.
- Net 30: Payment is due within 30 days.
- Milestone billing: Payment is divided across project stages.
Choose terms that match your cash-flow needs and the client relationship. New clients may be a better fit for an upfront deposit or shorter payment period. Larger companies may have fixed payment schedules that require patience.
If you charge late fees, explain the amount and when it applies in your contract. Do not surprise the client with a penalty that was never discussed.
Common Invoicing Mistakes to Avoid
Many payment problems come from small, preventable errors.
Sending an Invoice Too Late
Do not wait several months before requesting payment. Send your invoice according to the agreed schedule, ideally soon after completing the work or reaching a billing milestone.
Using Vague Descriptions
A vague line such as “consulting work” does not tell the client what they are paying for. Include enough detail to connect the charge to the project.
Forgetting the Due Date
“Payment due soon” is not a clear term. Write a specific date so everyone understands the deadline.
Mixing Personal and Business Money
If possible, use a separate bank account or payment account for freelance income. This makes it easier to track earnings and prepare financial records.
Failing to Track Payments
Sending an invoice is only half the process. Record the date it was sent, the due date, the amount, and whether it has been paid.
Ignoring Follow-Ups
A polite reminder is normal business communication. It does not mean you are being difficult or impatient.
How to Follow Up on an Unpaid Invoice
If the due date passes, send a friendly reminder. Keep the message professional and assume the delay may be accidental.
You could write:
“Hi Daniel, I wanted to follow up on invoice INV-014, which was due on August 5. Could you please confirm when payment is expected? I have attached the invoice again for convenience. Thank you.”
If the client does not respond, send a second message after a few business days. Refer to the contract and pause additional work if necessary. For larger unpaid balances, consider professional legal or financial advice in your area.
Use a Consistent Invoicing System
The best invoicing system is one you can use consistently. Create a folder for invoices, receipts, contracts, and payment confirmations. Name files clearly and back them up securely.
You can also maintain a simple tracking sheet with columns for client name, invoice number, issue date, due date, amount, status, and payment date.
As your business grows, an invoicing platform may save time by creating recurring invoices, sending reminders, accepting payments, and generating reports. Choose a tool that fits your budget and supports the currencies and payment methods your clients use.
Final Thoughts
Learning to create a professional freelancer invoice is one of the first important steps in building a dependable freelance business. Your invoice should be clear, accurate, easy to pay, and consistent with your contract.
Start with a simple template, use specific service descriptions, set realistic payment terms, and track every invoice from creation to payment. When invoicing becomes part of your regular workflow, you can spend less time chasing money and more time doing the work you enjoy.